
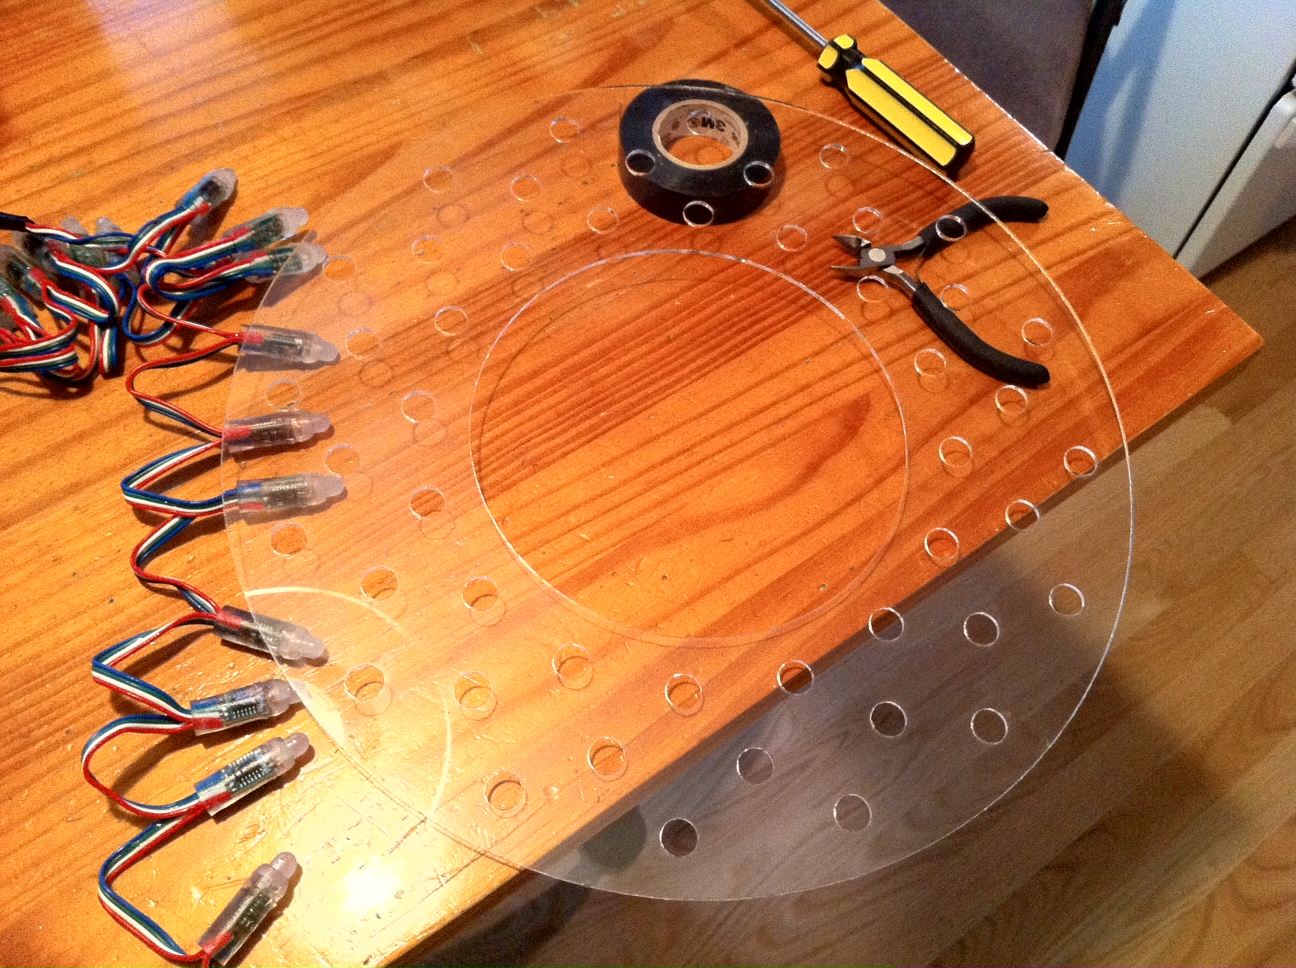
I was looking for a fun and simple project to learn about the new laser cutter at Sector 67, so I decided to use it to cut some acrylic to hold some RGB-addressable LEDs in the shape of a holiday wreath. My LEDs are a strand of 50 from Cool Neon (part number TCLPXL50), but similar LEDs are available from AdaFruit. They can be controlled from an Arduino or any microcontroller with GPIO. They mount into a 12mm hole in a material about 1.5 mm thick. The closest I could find was 0.080” acrylic at Menard’s, which seemed way too thick (by 35%!) but due to the compliance of the silicone the LEDs are covered in, it actually works perfectly. After prototyping different layouts and sizes I decided to go with a ring nearly 14 inches in diameter holding three concentric staggered circles of 16 LEDs each. I used Google
SketchUp to create the outlines to be cut, and used a plug-in (that I found for exporting STL files for 3D printing) to output a DXF polyline file. Fortunately, the laser cutter software opened this right up with no tweaking, and with the help of Sector’s laser expert Joe Kerman, the acrylic cut perfectly on the first try.
After mounting 48 of the 50 LEDs into the acrylic ring I wrote a program for the Arduino that sequenced through four different lighting patterns, including one my son coded up.
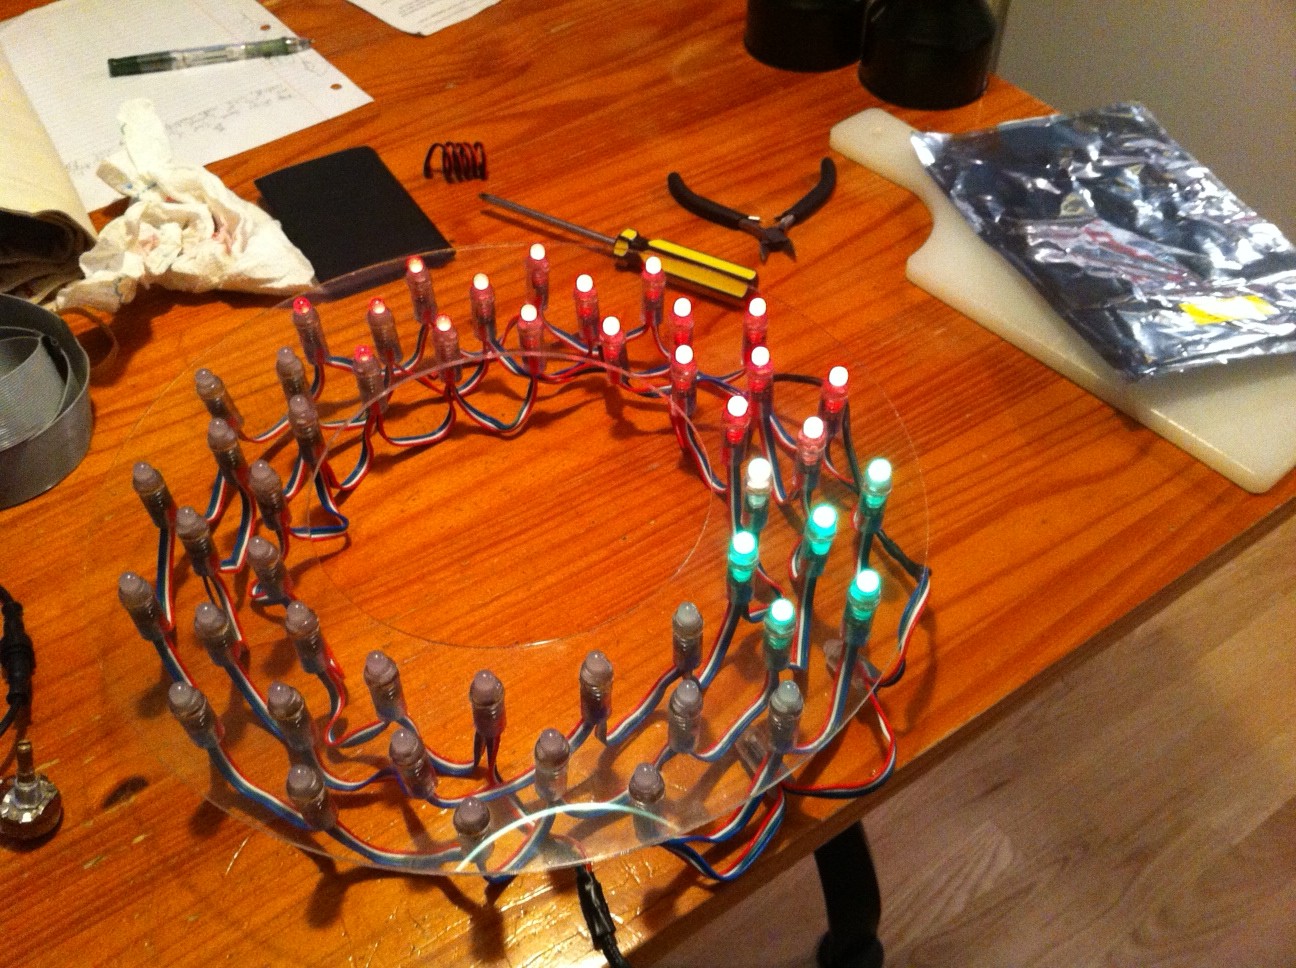
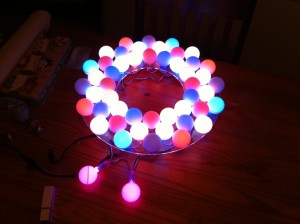
For a finishing touch we sanded logos off and drilled holes in four dozen ping-pong balls and put them over the LEDs, which changes the harsh LED point light sources into pleasant diffuse light emitting surfaces.
 Thus, the original idea was done and working. However, while working on this project, I remembered Cheerlights, the brilliant project that bridges Twitter and real-world festive lights. The idea is that anyone can send a tweet mentioning a color to @Cheerlights (or use the #Cheerlights hashtag) and lights around the world change to that color! I’ve been wanting to experiment with serial communication to the Arduino, and couldn’t resist making the LED wreath part of the Cheerlights collective.
So I wired up the $25 Arduino to a $2K Macbook Pro that acts as its gateway to the Internet. A Processing program on the laptop connects to the Cheerlights API to fetch the latest color, and sends it to the wreath as an RGB value. The two extra LEDs (tucked discreetly into the real wreath behind the LED ring) show the current Cheerlights color; however, when the color changes, the wreath excitedly announces it by blinking the new color for a few seconds.
A video of the lights in action:
Overall this was a fun weekend project and I’m excited to find more things to cut with the laser.
That’s awesome! Really fun project for Christmas. It got me to go learn a little about arduino programming.