
Jeff Whitehouse is a project person. His current project is building what will end up being a full sized, fully autonomous or remote controlled Wall-E. When faced with the next logical question “WTF” he responds “I build things. It’s my hobby. The Wall-E project is just the next step in projecting.”
Jeff was kind enough to explain making the silicone molds in his own words below:
The first step in finishing your project with an awesome product is to have a good idea of what your end product is going to look like. I started with CAD files generated in Sketchup (sorry Chris :)). Next, it’s time to produce this thing that you want many of. That is why you’re reading this right? You made the decision that you wanted to make a silicone mold of something and make many of them. I used the Stinger router to make a panel of my wheels for Wall-E.
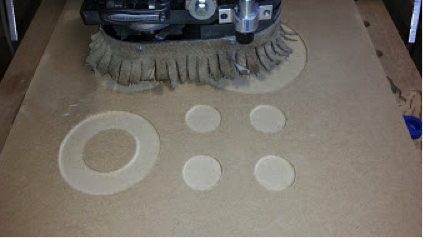
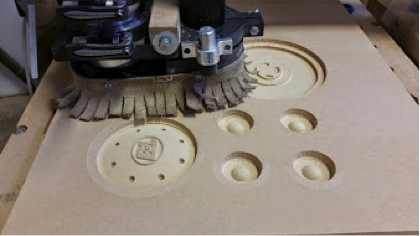
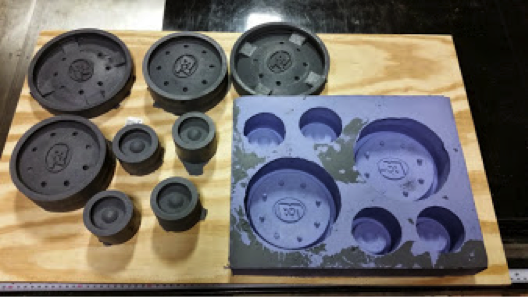
After 22 hours of watching the router go back and forth, some sanding, some gluing, some wood fill drying; you’ll end up with a set of positives. These parts will be the masters that your copies will look like in very fine detail. Make sure these parts are 100% what you want. The silicone you will be pouring will pick up all of the very fine detail and replicate that.
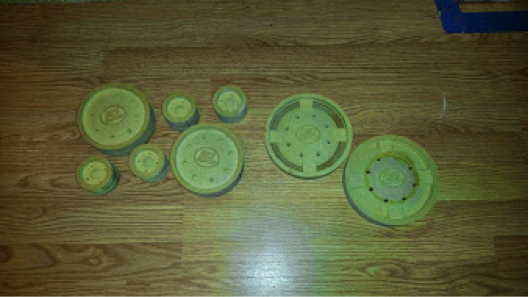
Are you happy with your positive? Are you sure? It’s still easy to make changes. Ready?
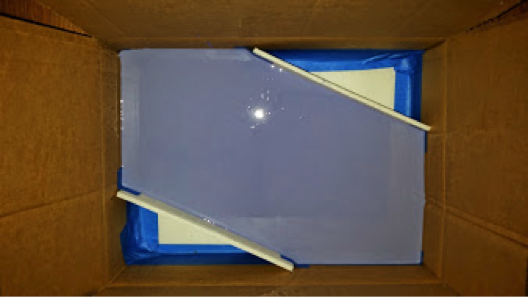
OK, Next step is to find a home for these parts. I used spare cardboard boxes from Amazon, because that’s what I have lying around. I could open my own Amazon distribution center with all of the boxes. If you don’t want to fill in all of the empty space with silicone (because it’s EXPENSIVE) then tape off a section. Make sure the tape adheres with a watertight seal. The silicone will find an out if you leave one. I used blue tape because the wax backing will make releasing the silicone easy. Then pour. I used Oomoo 30 from Smooth-On. It was $30 for a set (part A, part B) from Amazon. Make sure you read the information on Smooth-On’s website for estimating how much you’ll need. If you don’t order enough, no problem. The cured silicone will adhere to freshly poured silicone, provided it’s the same stuff and the cured stuff is kept clean. Let me put it another way for people keyword searching: Oomoo 30 will stick to cured Oomoo 30.
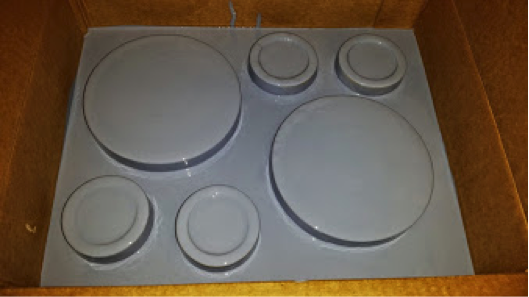
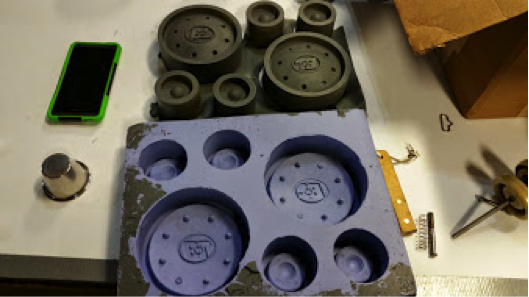
If you can arrange everything in a box and take up all of the space, that would be OK also. Make sure you leave some spacing between parts to add some structure to the mold. This picture shows a half filled molding area so that you can see the spacing and what the mold looks like partially poured.
Finish by pouring enough to cover everything to a depth of at least ¼ inch. You don’t want the silicone to rip as you are releasing parts. Also make sure everything is level. The silicone will find level by itself. Make sure you’re OK with that.
Once the silicone has setup, overnight in my case because it was late enough when I was doing this, be gentle in removing your parts. You don’t want to rip your cured mold.
Now it’s time to make our parts. First decide on what you’ll be making your part out of. Actually you should of done that before you got to this point. I used Urethane with a durometer of 80 shore D.
I also used gray spray primer as a release agent. While the urethane is wet, it’ll stick to just about everything. Once it’s cured, paint may not adhere to your liking. However, if the paint and urethane are introduced while the urethane is wet, then the two will stick and give you a paintable surface after the urethane has cured. DO NOT USE WATER BASED PAINTS. Urethane and water based paints do not like each other. Kinda like those two friends you have that will never come to a party if the other one will be there. You can use a release agent like Mann200 and be OK, you just may not have a paintable surface.
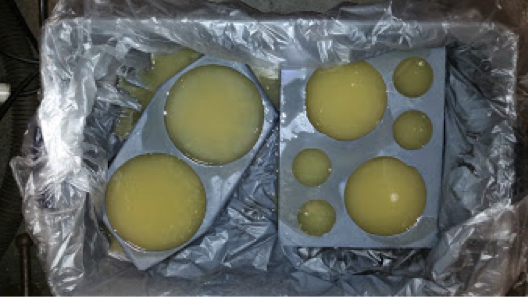
Now mix and pour. Overfill your mold. It is easy to machine or sand the part down. It’s a pain in the arse to add more material. I placed the molds on a piece of plywood wrapped in a trash bag. Put that inside of a rubbermaid tub wrapped in a trash bag on a level surface where no one will kick it and disrupt the surface tension of the urethane, in my case.
Then wait,and wait some more. You don’t want to move things until the urethane, in my case, has fully cured. If you’re going to move your part early, send the money you’ll waste to me 🙂
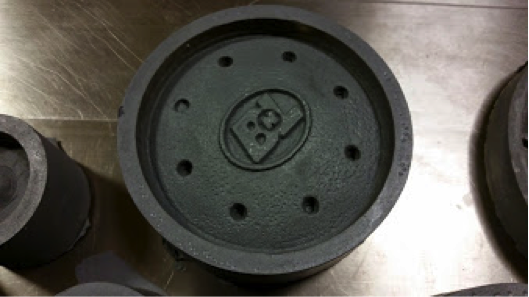
Once things have cured, you’ll be able to remove the part like popping ice out of a tray.
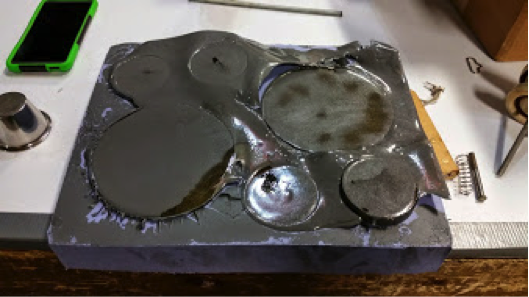
In the picture above you can see the paint on top mostly adhered to the urethane. Some paint shifted because of surface tension. Not a big deal, it’s on the back.
Now clean up the rims, make more, and show off your handy work; that you totally did on your own without the help from a blog on the internet.