
Using tools at Sector67, Nyika Campbell was able to transform her drawing of a sword in a notebook into a full-size, steel sword that looks like it could do some very serious damage. Before coming to Sector67, Nyika had already made a few full-size wooden swords with steel edges, leather wrapped wooden handles, and doorknob pommels–but after taking a class on metalworking at Madison East High School, Nyika decided to take it a step further.
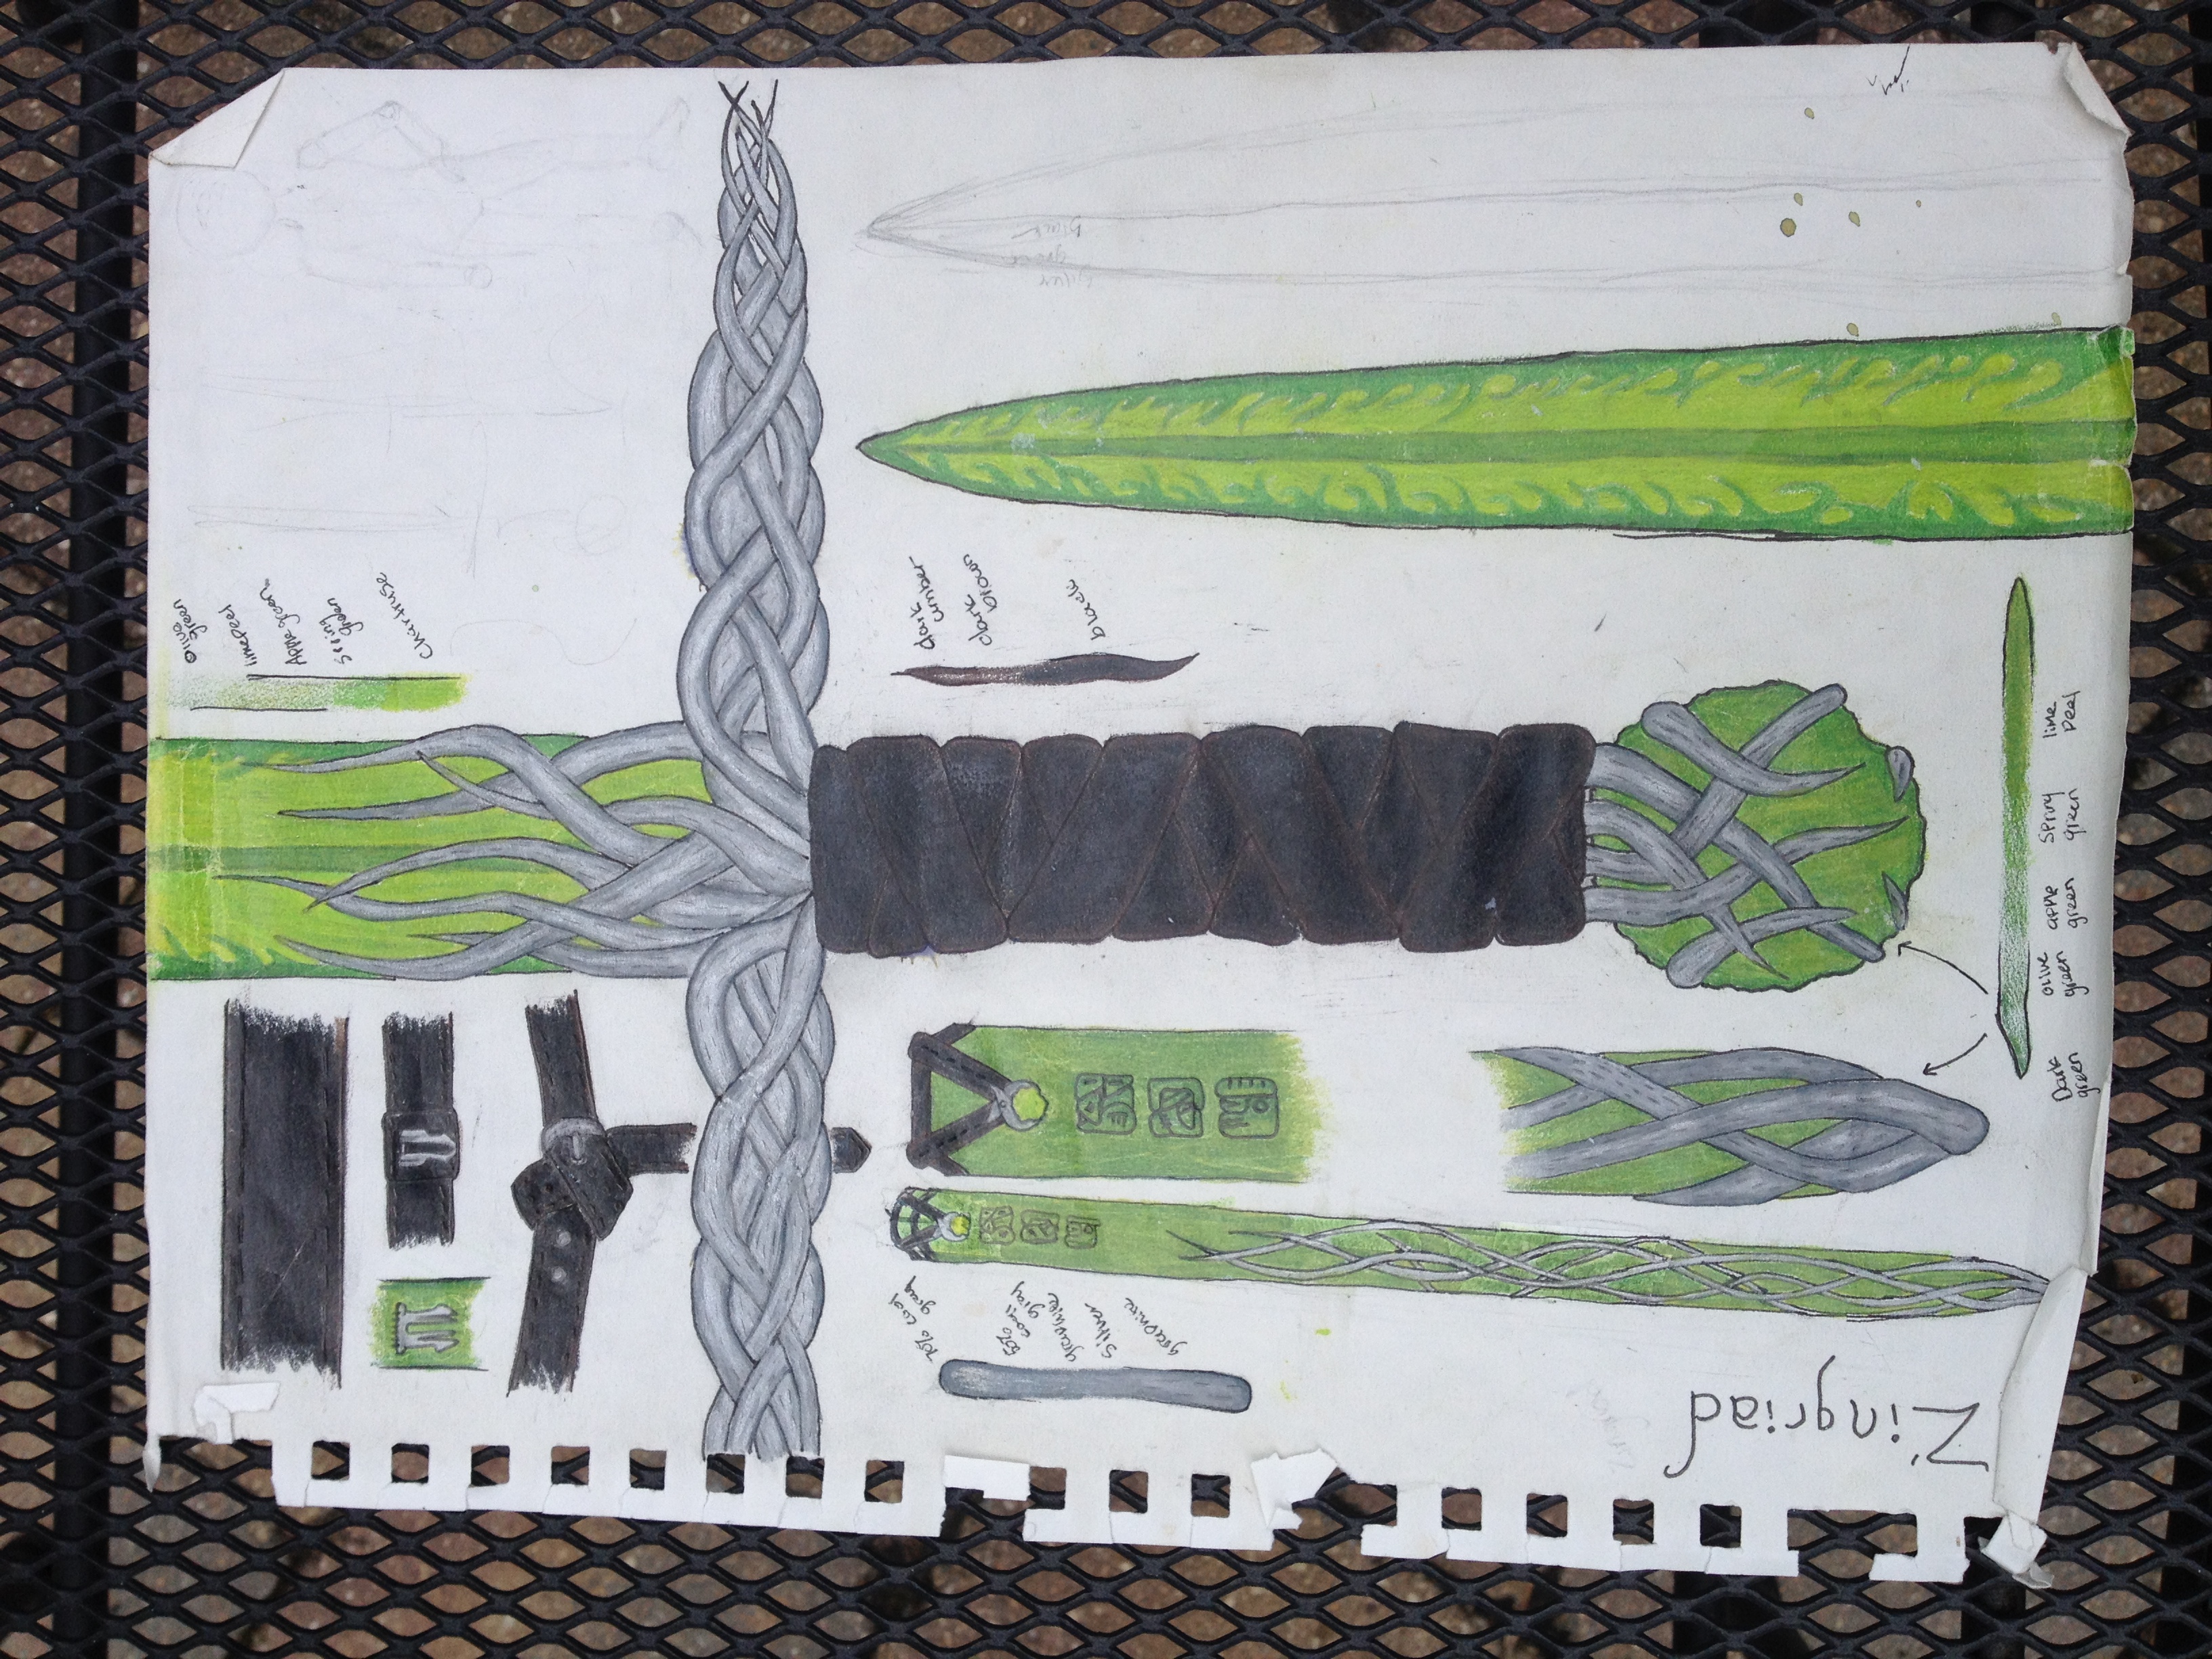
Nyika’s original drawing in her notebook, which served as the inspiration for her new sword, Dark Stars
Nyika started off by ordering a flat cutout of 1080 steel, which she then shaped using the mill and smoothed out with a file to form the blade. She then sand-cast a bronze cross-guard and ring pommel. In addition, she cut and shaped a wooden sheath to safely contain the sword during transport. Although Nyika already had experience with sword making and metal working when she first came to Sector67, she has also learned a lot at the space. “Chris, Tim, and other Sector people have helped me with the various stages of this project, from research to welding. I could never have done this without their help.” says Nyika.
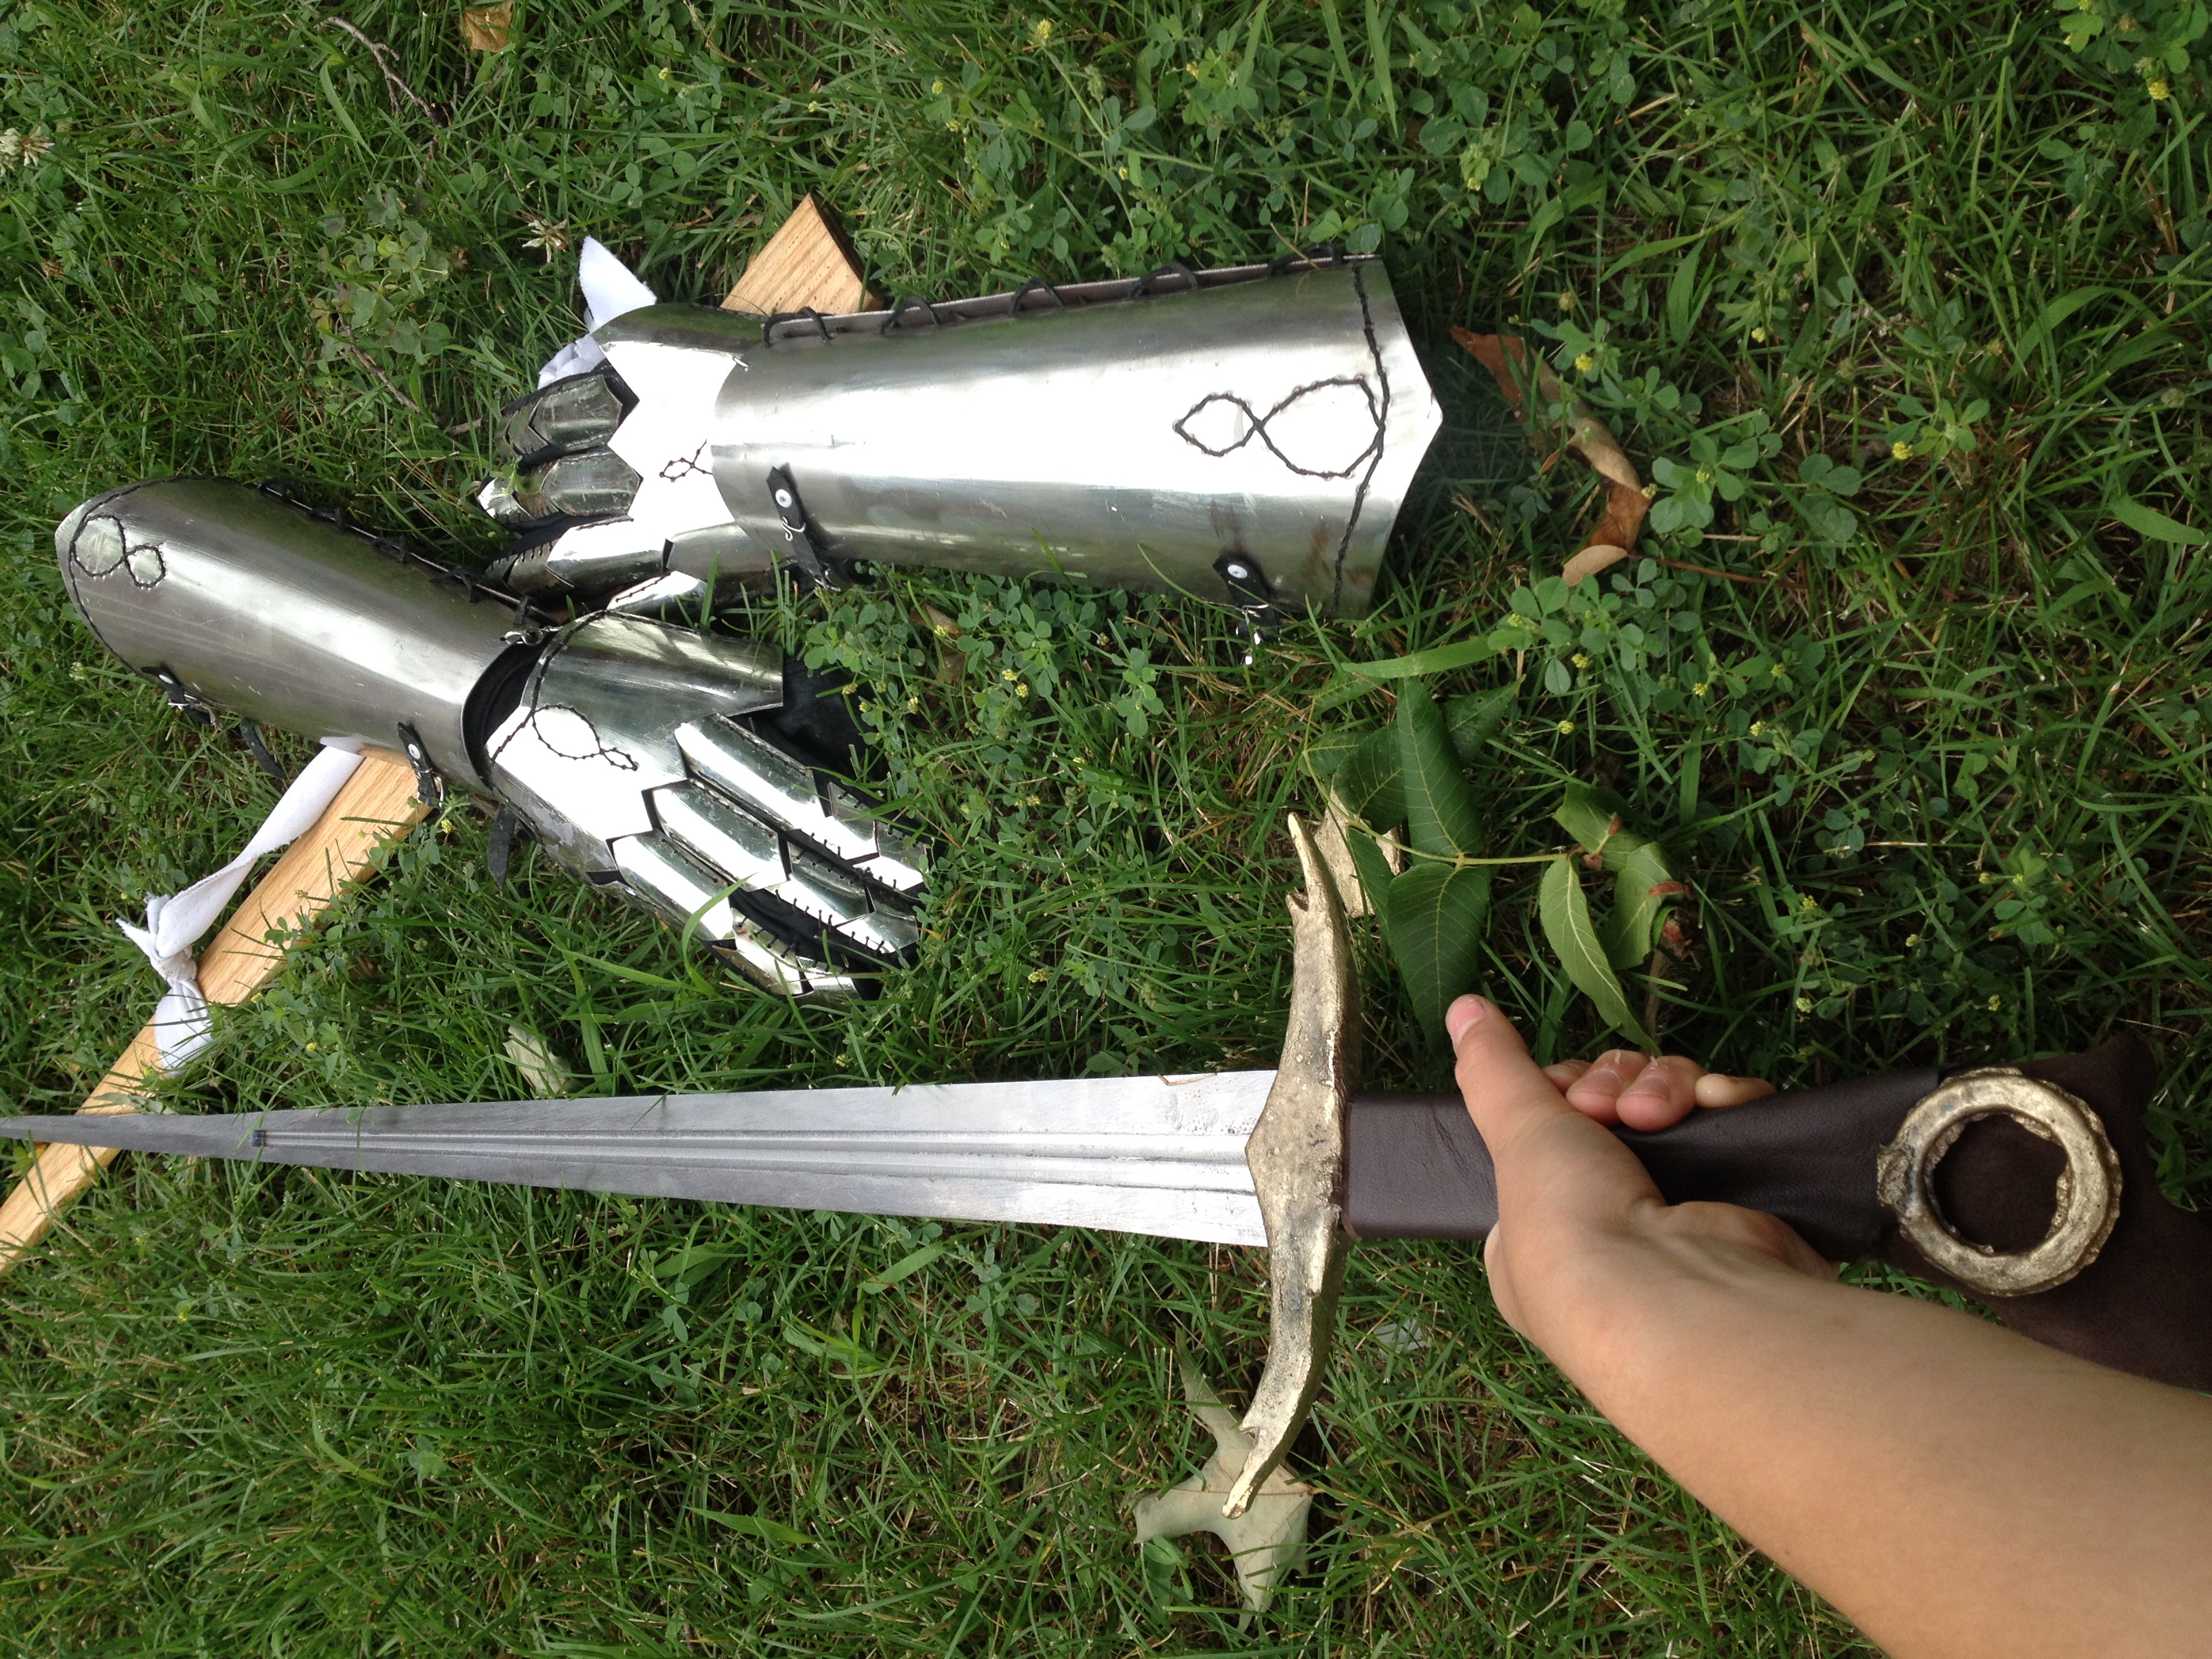
The blade, cross-guard, and pommel in their positions, along with her sheath and gauntlets (made with friend at Madison East metal shop) in the background
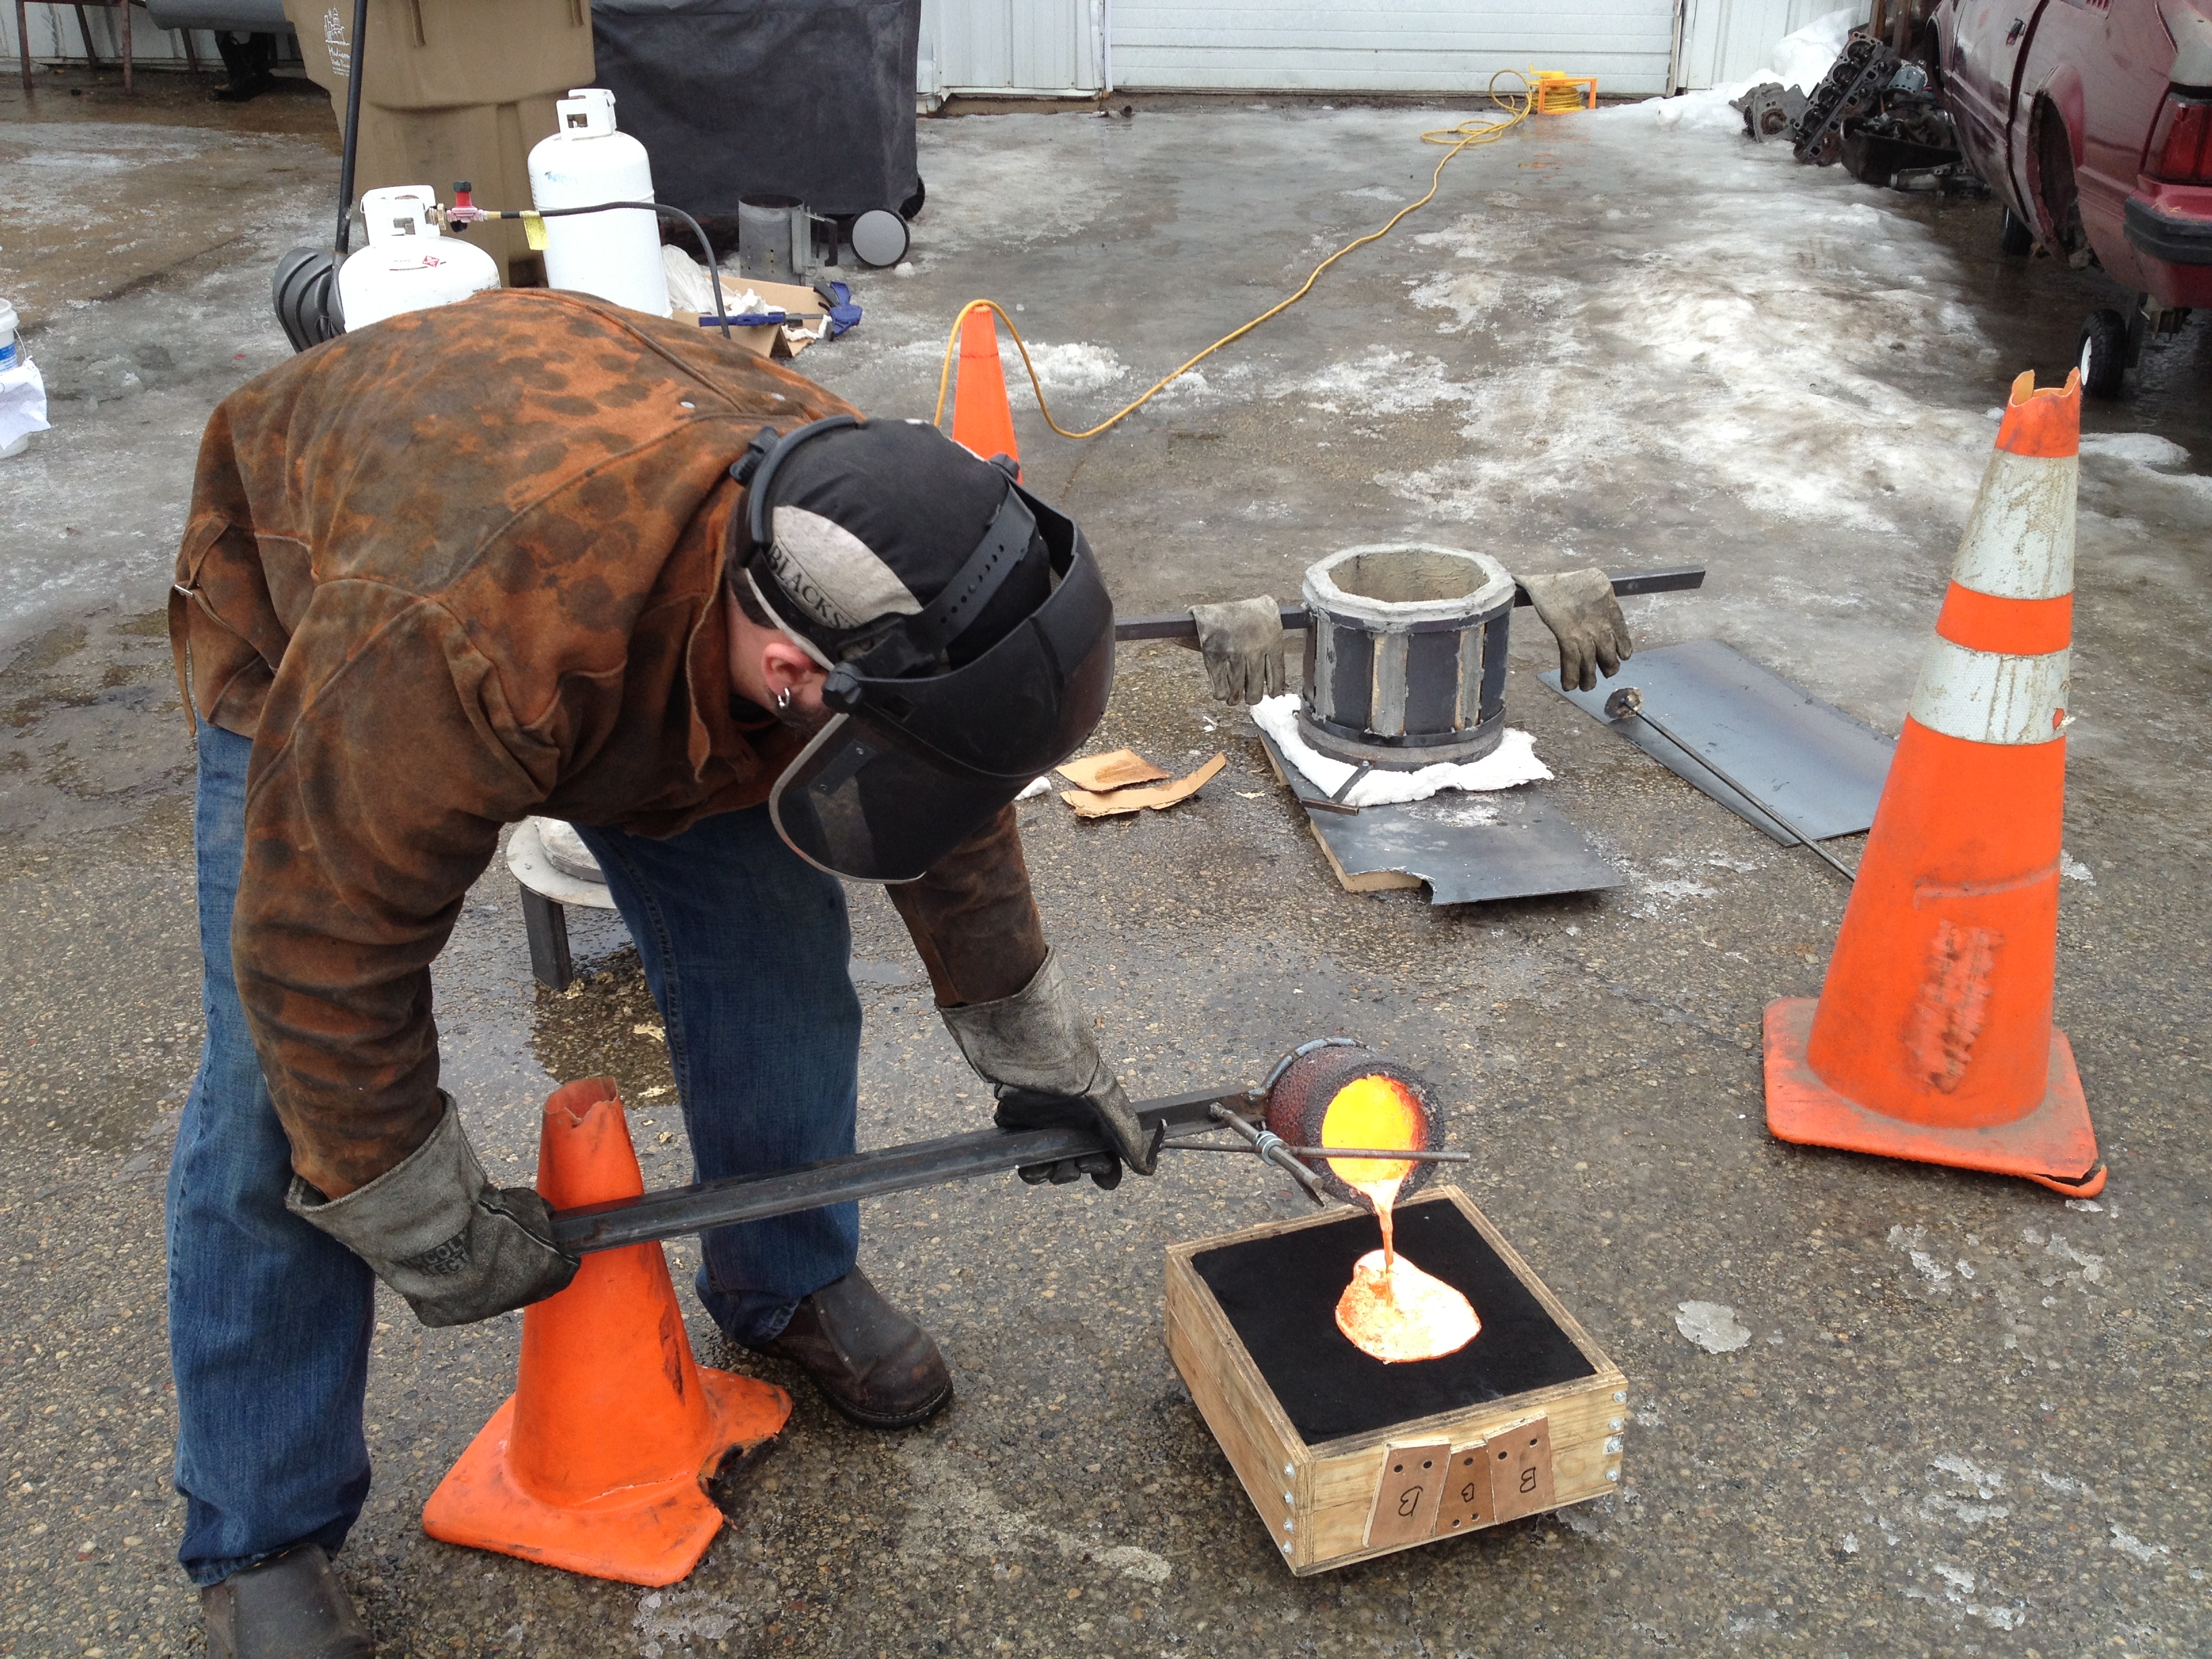
Tim helped out with the sand-casting and Chris with the milling
Although the sword looks nearly finished, there is still a lot Nyika plans to add before calling it complete. Other than welding together the parts she’s already made, she plans to add a butcher knife style wooden handle and a labradorite stone to the pommel. She will then wrap the handle and sheath in leather. Finally, she will engrave a quote from Shakespeare’s 12th Night on the cross-guard. This play is where the sword gets its name, Dark Stars.
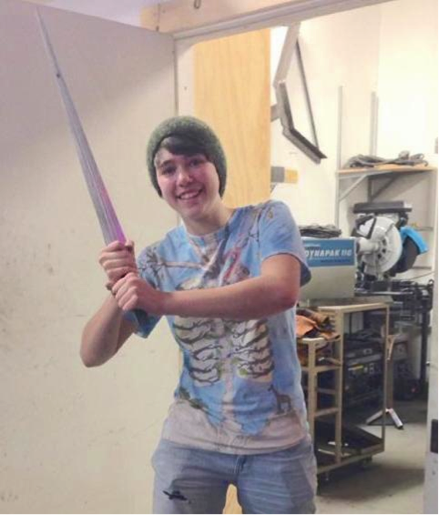
Nyika holding the blade of Dark Stars at Sector67
[Editor’s Note] Some more information on the process (boring sword machining steps to follow):
Making swords is very difficult and takes many many many many many hours!
We started with a 1080 steel blank that was laser cut from a Solidworks drawing at Engineered Metal Products. The rationale for using 1080 is that it can later be heat treated for increased hardness to hold an edge, but in practice it’s pretty darn sharp as it is as long as it’s not being used in battle (remember, the zombie apocalypse will arrive someday!). Machining a blank seems relatively straightforward, but we needed to taper all 4 edges as well as machine a fuller (blood gutter sounds a lot cooler, but Wikipedia is helpful with the real reasoning behind the fuller, weight!). We started with the blank flat on the table and tilted the head of the mill to give it the correct angle:
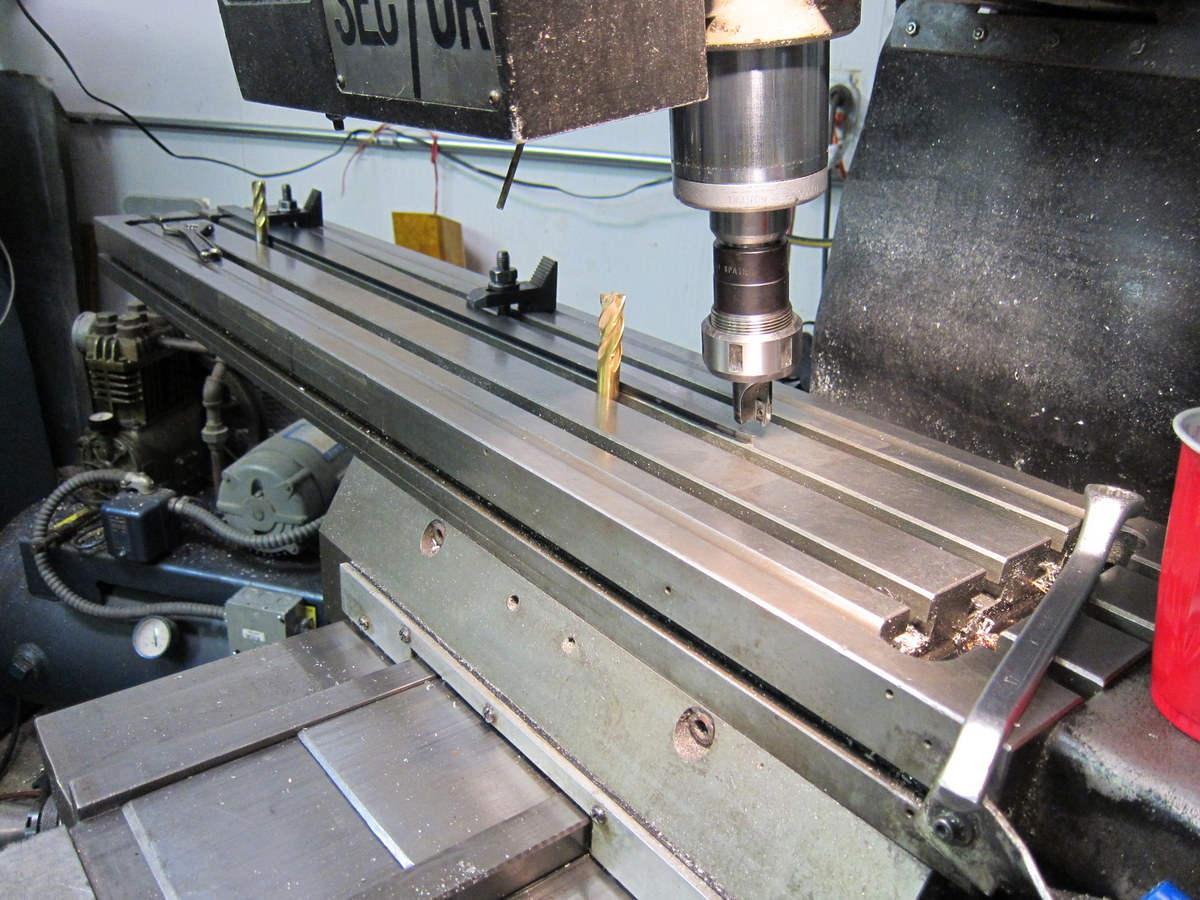
Getting the blank straight on the table (hence the two yellow HSS cutters used as dowels)
Once the blank was straight on the table, the cutter was zeroed on the edge of the blank and we calculated the desired depth (at this point a cutter translation into the table at the angle of the head). The cutter was run back and forth until the depth was achieved (during which long discussions ensued about why sword makers prefer to use giant grinders, forges, and sanders to remove material – it’s much quicker). We used up lots of oil to keep the cutter cool:
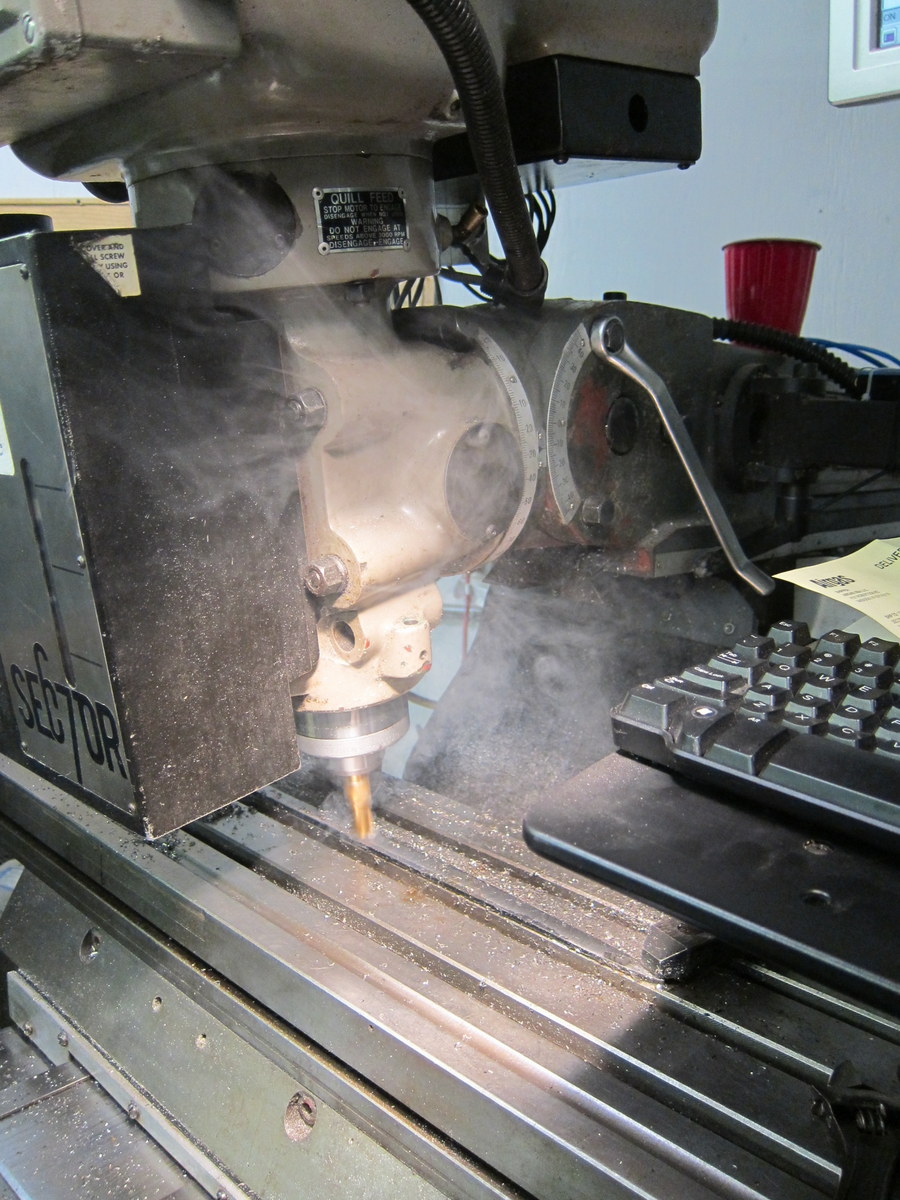
Perpetual cloud of oil coming off the cutter and slow removal rates are typical of machining steel.
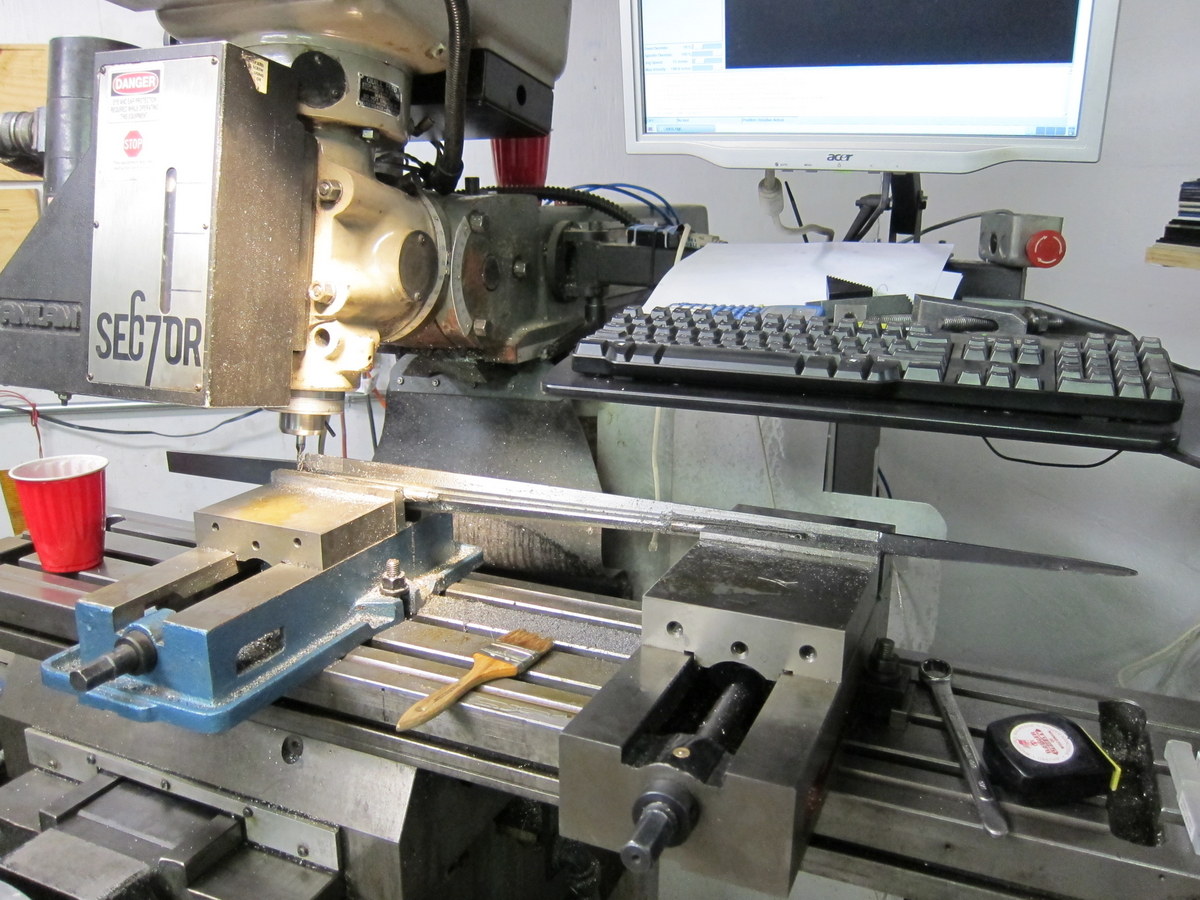
Once we had the first corner (of 4) cut down, we started to realize how difficult clamping it was going to become. The tip of the sword ends up a 4 way taper at the middle of the blank, meaning that we’re removing the flat face of the blank, not an issue yet until we flip it over. What is an issue, is that we don’t have any flat surfaces from the midway point of the blank towards the tip to clamp down on without putting a side load on the blade and causing it to displace in plane with the table. As you can see in the next image, we ended up using 4 clamps to keep the blade stable, as we cut further to the left (towards the tip) we had to clamp and unclamp the center or end of the blade to avoid running into the clamps with the cutter (IE: we’re cutting the full width of the blade, we can’t clamp anywhere until the cutter is clear of the area being cut, meaning a lot of moving the clamps as the cutter takes passes).

The middle (3rd from the right) clamp and the end clamp (very left by the oil container with the blue handle) were swapped as the cutter cleared center moving left and returned right
The next step was machining the twin fuller on this edge, we decided to wait until after cutting both angles on the top face because we weren’t sure where it should stop to avoid thinning the blade too much. This could of course be modeled, but then we’d have to machine accurately to the model to get the same results, something we weren’t ready to commit to!). Once the fuller was machined to the desired depth on the front, we had to flip it over and address the fact that the blade was no longer flat on the new bottom, which turned out to be a major PITA. We decided to machine the second twin fuller on the other side, so we’d have a pair of grooves opposite one-another on each side, this would allow us to clamp the sword vertically across two vices (which both had to be squared, with the sword edge indicated parallel to the table to a few thousandths of an inch) shown here:
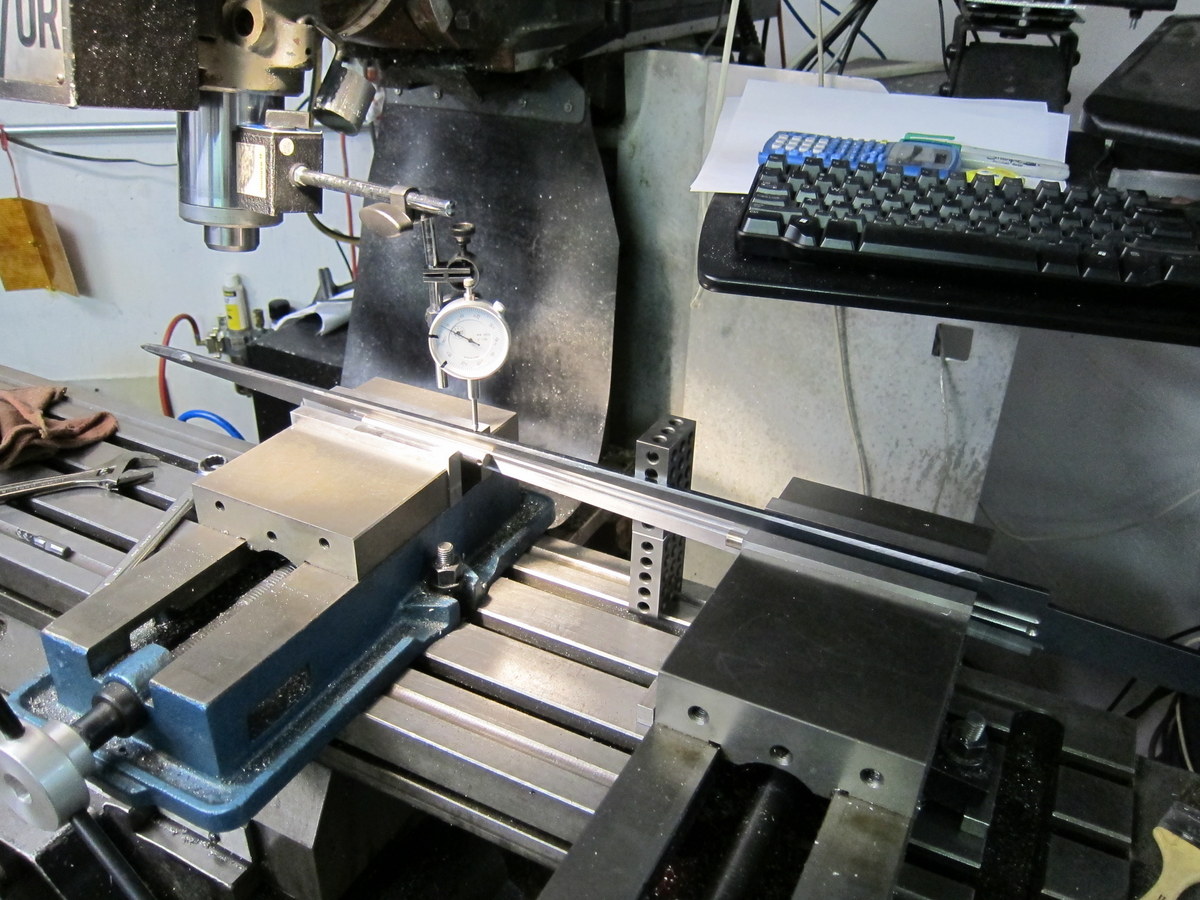
Using a dial indicator off the spindle to indicate parallel to the table (note the dowels in the fuller on each vise) as well as a set of 1-2-3 (swiss cheese looking) blocks in the middle of the frame as a vertical reference off the table.
We then used a rougher to trim down the blank on the two remaining faces:
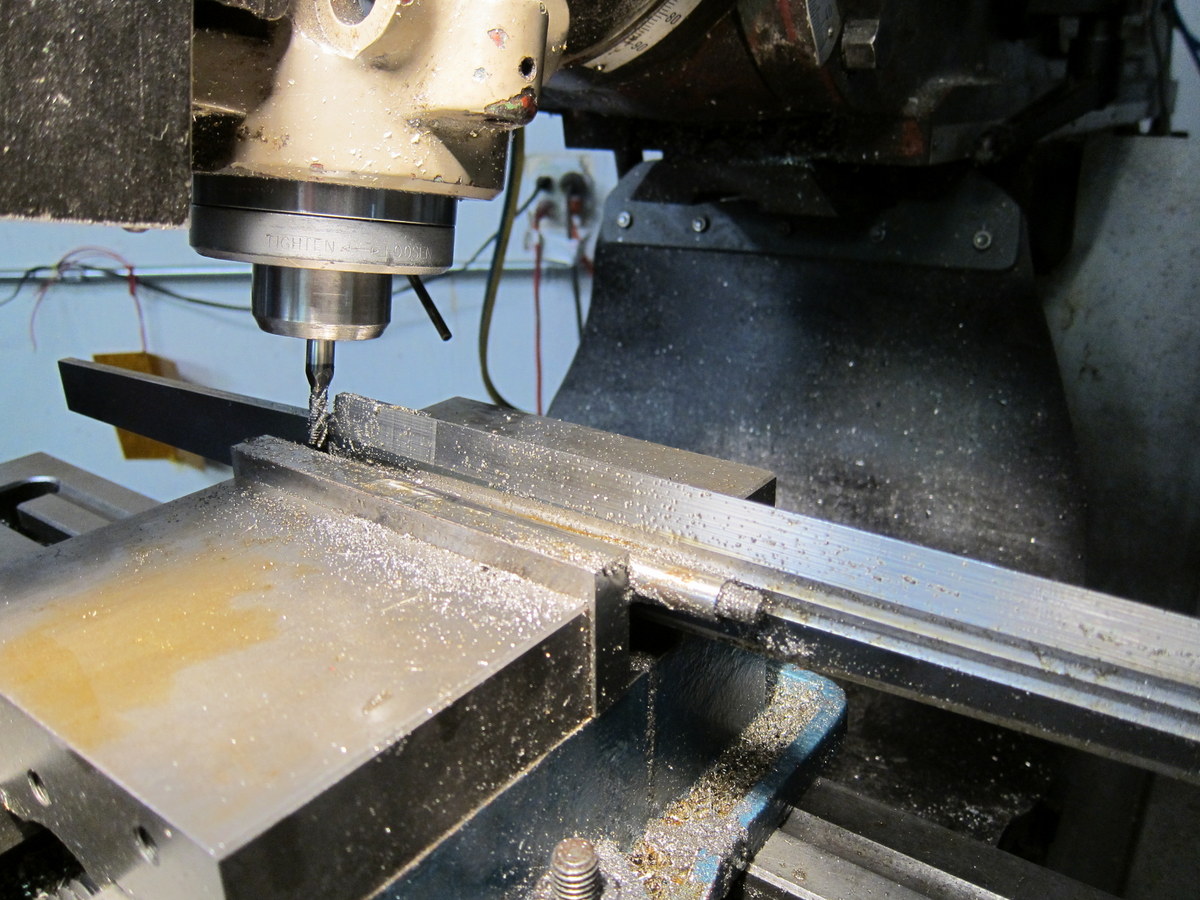
Roughing end mill doesn’t chatter as badly on the vertical surface.
We weren’t able to solve the tip of the blank, leaving it instead for a hand filing finish (which was found to have a surprisingly high material removal rate), leaving Nyika with a substantial chunk of hours to invest in finishing it off:
Note the far right end of the blade is unfinished on the mill.